How to Winterize an ATV or UTV for a Canadian Winter
Excerpt: Most machines that die over the winter are not killed by the cold. They are killed by what got left in the fuel tank, the battery nobody charged, and the acidic oil that sat in the crankcase for five months. Here is the full winterizing process for a Canadian season, in the order you should actually do it, plus what changes if you plan to keep riding.
Every spring, powersports shops across Canada fill up with the same machines. Gummed carbs, dead batteries, seized brake calipers, chewed wiring. Almost none of it is bad luck. Almost all of it comes down to a weekend of work in October that never happened.
The good news is that winterizing an ATV or side by side is not complicated and it is not expensive. Give it two or three hours, spend maybe sixty dollars on supplies, and your machine starts on the first try in April instead of going on a two week waiting list at the dealer.
Here is how to do it properly.
Step 1: Wash It, Then Actually Dry It
Start with a wash, and do it on a day warm enough that the machine can dry fully afterward. Mud that sits on a frame all winter holds moisture against the metal, and moisture plus five months equals rust in every spot you cannot see.
Pay attention to the underside, the radiator fins, the skid plates and the suspension linkages. A pressure washer is fine, but keep it away from wheel bearings, the airbox intake and any electrical connector. High pressure water forced past a seal is one of the more common ways people create a problem while trying to prevent one.
Once it is dry, hit the exposed metal with a light coat of corrosion spray, and put a bit of dielectric grease on the electrical connectors you can reach. That last one takes five minutes and prevents a surprising number of gremlins.
Step 2: Deal With the Fuel, and Do Not Skip This
This is the step that matters most, and it is the one that puts the most machines in the shop every spring.
Modern Canadian pump gas contains ethanol, which does two unhelpful things over a long storage period. It absorbs water out of the air, and it breaks down into varnish that coats the inside of your fuel system. In a carbureted machine that varnish plugs the jets. In a fuel injected machine it fouls the injectors and the pump, which is a much more expensive conversation.
Do this instead:
- Fill the tank. A full tank has almost no air space, which means almost no room for condensation to form. A half empty tank is a humidity trap.
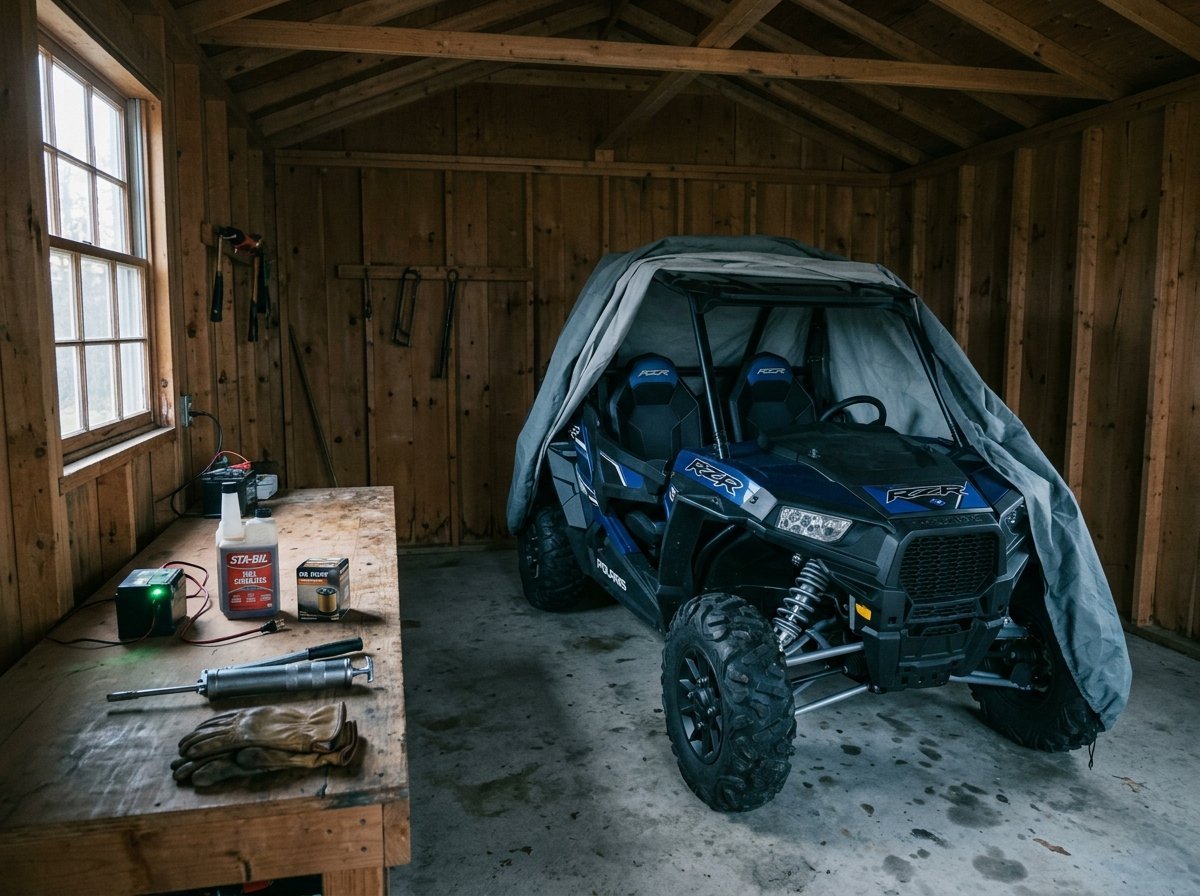
- Add fuel stabilizer at the dose on the bottle. Roughly ten dollars, and it is the single highest value item in this whole list.
- Run the engine for ten minutes after adding it. This is the part people miss. Stabilizer sitting in the tank does nothing for the fuel already in the lines, the pump, the carb bowl or the injectors. It has to circulate through the whole system.
If your machine is carbureted and you would rather store it dry, shut off the fuel petcock and let it run until it stalls, which empties the bowl. Both approaches work. Do not do neither.
Step 3: Change the Oil Before Storage, Not After
This one catches out a lot of riders who figure they will just do it in the spring anyway.
Used engine oil is contaminated with combustion acids and moisture. Leave that sitting against bearing surfaces and cylinder walls for five months and it quietly etches them. Fresh oil is chemically neutral and it sits there doing nothing harmful.
So change the oil and the filter now, run the engine a couple of minutes to circulate it, then shut it down. If your machine is due for a gearcase or differential oil change, this is a sensible time for that too. While you are under there, hit every grease fitting you can find. A grease gun is about twenty dollars and most ATVs have more zerks than owners realize.
Step 4: The Battery Is the Other Thing That Dies
A fully charged lead acid battery is good to roughly forty below. A battery sitting at half charge can freeze at temperatures a Canadian October will hand you without trying, and a frozen battery is finished.
Two options, both fine:
- Leave it in the machine on a smart tender. A maintainer that pulses and monitors, not an old style trickle charger that just pushes current and cooks the battery over a winter. Budget thirty to fifty dollars.
- Pull it out and store it somewhere above freezing, topping it up every four to six weeks.
Either way, clean the terminals first and give them a smear of grease. If your battery is already three or four years old and it was getting lazy this summer, replace it in the fall rather than discovering the problem on the first good riding day in April.
Step 5: Coolant, Brakes and Tires
Coolant. Check the freeze point with a cheap tester, or just check the level and the colour if you know it was done recently. Coolant that has gone weak or brown has lost its corrosion inhibitors and its freeze protection at the same time. In this country that is not a detail you can let slide.
Brakes. Do not leave the parking brake engaged all winter. Pads can bond to the rotor and you will find out when you try to move the machine in the spring. Chock the wheels instead. If you are on a slope, chock them properly.
Tires. Get the machine off the ground if you can manage it, using jack stands or blocks under the frame. If you cannot, inflate the tires to the higher end of their range and move the machine a quarter turn every few weeks so it is not resting on the same patch of rubber the whole time. Flat spots from five months of sitting will usually work themselves out, but they are annoying and avoidable.
Step 6: Keep the Mice Out
Rodent damage is not a rare event. In a barn, a shed or an unheated garage it is close to a default outcome, and chewed wiring harnesses are genuinely expensive to fix.
Block the entrances. Plug the exhaust tip with steel wool or a proper exhaust plug, and hang a bright tag off it so you remember to pull it out before you start the engine. Do the same for the airbox intake. Mice will build a nest in an airbox in about a week if you let them.
For deterrents, steel wool works because they cannot chew through it. Peppermint oil and dryer sheets have their fans and are worth a try. Poison bait is the option many people reach for, but think about it carefully if you have pets or if the machine is stored anywhere kids can get to.
Step 7: Cover It, but Cover It Right
A breathable ATV or UTV cover is what you want. A plastic tarp is worse than no cover at all, because it seals moisture in against the machine and you end up with condensation, then surface rust, then mould on the seat.
Indoors and unheated is ideal for most people. A heated garage sounds better but it is not, because the daily temperature swing creates condensation cycles. Steady and cold beats warm and fluctuating.
If the machine has to live outdoors, get it off the bare ground onto pallets or gravel, angle the cover so water sheds off rather than pooling on the seat, and check on it after every big storm.
What If You Are Not Storing It?
Plenty of Canadians ride right through the winter, and plenty more keep a machine running for plowing the driveway. If that is you, skip the storage steps but do not skip the maintenance.
Change the oil anyway, before the cold arrives. Check the battery, because winter is exactly when a marginal one gives up. Make sure your coolant is genuinely rated for your worst expected night, not just "probably fine." Think about heated grips and a windshield if you do not already have them, because those two items change winter riding from an endurance test into something you actually enjoy.
Cold weather also means winter specific tires or chains on some machines, and it means paying attention to where you ride. Trail networks change their rules completely once snow arrives, and in most provinces an ATV on a groomed snowmobile trail is either restricted or flatly prohibited. Our guide to how the rules change between provinces is worth reading before you plan a winter trip, and the MudWheelz Trail Finder is the place to check what is open near you.
Two Things to Sort Out While the Machine Is Parked
Insurance. Do not cancel your policy for the winter without understanding what you are giving up. Storage months are when a large share of ATV and UTV thefts happen, precisely because the machine is sitting untouched and nobody would notice for weeks. Confirm that your off road coverage includes theft while in storage before you make any changes to save a few dollars.
On the same subject, winter is a sensible time to add a GPS tracker or improve how the machine is secured. We covered the practical side of that in our piece on protecting your ride from theft.
Parts and upgrades. The off season is the cheapest and least frustrating time to do work you have been putting off. No waiting on backorders in the middle of riding season, and no losing a good weekend to a job you could have done in January. Winch, bumper, skid plate, better lighting, a set of tires: all easier now. Have a look at ATV and UTV parts while you have time to plan properly.
The Quick Checklist
- Wash the machine and let it dry fully
- Spray corrosion protectant on exposed metal, grease the electrical connectors
- Fill the tank, add stabilizer, run the engine ten minutes
- Change the engine oil and filter, then run it briefly
- Grease every fitting you can find
- Battery on a smart tender, or removed and stored warm
- Check coolant strength and level
- Release the parking brake, chock the wheels
- Get the tires off the ground, or inflate and rotate periodically
- Plug the exhaust and the airbox, and tag the plugs
- Breathable cover, unheated space, off the bare ground
- Confirm your insurance still covers theft in storage
The Bottom Line
An afternoon in October is worth more than a shop bill in April. The fuel and the battery are the two that account for most spring failures, so if you only have an hour, do those two and do them properly.
And if you go through this list and conclude the machine is not really worth the effort any more, that is useful information too. Fall is when sellers get motivated and buyers have leverage, which makes it a decent time to move on. You can list it free on MudWheelz, or browse used ATVs and side by sides across Canada if you are shopping for the replacement.
Related Reading
- Buying a Used ATV or Side-by-Side in Canada: The Complete Pre-Purchase Checklist
- Canada's Powersports Numbers Just Landed: What They Mean for Used Buyers
- Utility vs. Sport UTVs in 2026: Which One Actually Fits Your Riding Style?
Always follow the storage and service intervals in your owner's manual. Specific requirements vary by make, model and engine type.